이전 글에서는 "마스크 착용 여부 탐지 프로젝트"의 YOLO 파인튜닝 과정에 대해서 간단하게 알아봤습니다.
[인공지능 프로젝트] 마스크 착용 여부 탐지 프로젝트 - 2편
이전 글에서는 "마스크 착용 여부 탐지 프로젝트"의 개요를 간단하게 알아봤습니다.https://whitecode2718.tistory.com/183 [인공지능 프로젝트] 마스크 착용 여부 탐지 프로젝트 - 1편이번에는 제가 학교에
whitecode2718.tistory.com
📌 깃허브 링크: https://github.com/lko9911/Mask_Detection_Project
GitHub - lko9911/Mask_Detection_Project: 강원대학교 2024 빅데이터분석및활용 과목 기말프로젝트 과제 : 마
강원대학교 2024 빅데이터분석및활용 과목 기말프로젝트 과제 : 마스크 착용 여부 감지 프로그램 개발 - lko9911/Mask_Detection_Project
github.com
이번에는 모델을 학습하기 위한 데이터 전처리 과정을 중심으로 설명하겠습니다.
1. Deep Learning Classification Model의 개요
딥러닝 분류 모델을 사용하여 사진을 "mask_weared_incorrect", "with_mask"로 이진분류하는 것이 목표입니다. 이때, 데이터 불균형 문제가 발생할수 있어 데이트 증강을 적용한 후 전이학습에 사용합니다.
딥러닝 모델은 통상적으로 사용하는 단일 층 모델, NN 모델 3가지 (ANN, DNN, CNN), 7가지의 전이학습 모델을 사용하여 각각 정확도, 손실률, confusion matrix를 비교할 예정입니다.
데이터 증각이 적용된 데이터셋은 60%를 학습셋으로 나머지 40%를 테스트셋으로 사용하였스며, 검증셋은 모델 자체 내에서 학습셋의 일부를 사용하였습니다.
학습 파라미터는 비교를 위해 전부 Epoch = 50, batch_size= 16으로 통일하고, 검증셋의 손실함수 값 기준으로 조기 종료 콜백을 지정하였으며, sigmoid함수를 활성화 함수로 두었습니다. (이진 분류이기 때문에)
# 모델 분석 및 시각화 도구
import numpy as np
import pandas as pd
import random
import matplotlib.pyplot as plt
import seaborn as sns
import cv2
import xml.etree.ElementTree as ET
import os
from sklearn.metrics import confusion_matrix, accuracy_score

# 모델 설계
from tensorflow.keras.models import Sequential, Model
from tensorflow.keras.layers import Conv2D, MaxPooling2D, Flatten, Dense, Dropout, BatchNormalization, LeakyReLU, Flatten, GlobalAveragePooling2D
from sklearn.model_selection import train_test_split
from sklearn.preprocessing import LabelBinarizer
from tensorflow.keras.utils import to_categorical
from tensorflow.keras.callbacks import EarlyStopping, ModelCheckpoint, ReduceLROnPlateau
from tensorflow.keras.optimizers import Adam
from sklearn.preprocessing import LabelEncoder
from sklearn.model_selection import train_test_split
# xml 파일의 라벨을 리턴하는 함수 (필터링용)
def parse_xml(xml_file):
    tree = ET.parse(xml_file)
    root = tree.getroot()

    # 레이블을 추출하는 부분
    label = None
    for obj in root.iter('object'):
        name = obj.find('name').text
        if name in ['with_mask', 'mask_weared_incorrect']:  # 유효한 레이블만 처리
            label = name
            break

    return label
YOLO 학습을 위한 데이터는 "with_mask", "without_mask" 의 두종류였기 때문에 분류 모델을 위한 데이터셋을 "with_mask", "mask_weared_incorrect"로 재구성해야 합니다.
본 프로젝트에서는 with_mask를 올바르게 마스크를 쓴 경우, mask_weared_incorrect를 올바르게 마스크를 쓰지 않은 경우로 구분합니다.
input_dir = '/root/.cache/kagglehub/datasets/andrewmvd/face-mask-detection/versions/1/annotations'
output_dir = 'result/labels'
image_dir = '/root/.cache/kagglehub/datasets/andrewmvd/face-mask-detection/versions/1/images'
# 위의 부분은 YOLO 학습시 이미 정의함

annotations_dir = input_dir
images_dir = image_dir

image_data = []
labels = []

for xml_file in os.listdir(annotations_dir):
    if xml_file.endswith('.xml'):

        xml_path = os.path.join(annotations_dir, xml_file)
        label = parse_xml(xml_path)

        # 필터링 (without_mask 제외)
        if label is None or label == 'without_mask':
            continue

        image_file = xml_file.replace('.xml', '.png')
        image_path = os.path.join(images_dir, image_file)

        if os.path.exists(image_path):

            image = cv2.imread(image_path)
            image = cv2.resize(image, (128, 128))  # Resize to 128x128

            image_data.append(image)
            labels.append(label)

X = np.array(image_data)
y = np.array(labels)

print("라벨 분포:", dict(zip(*np.unique(y, return_counts=True))))
데이터셋이 불균형하기 때문에 각 데이터증강기법을 사용하여 데이터의 양을 비슷하게 만들어줍니다.
from tensorflow.keras.preprocessing.image import ImageDataGenerator

# 데이터 증강 객체
datagen = ImageDataGenerator(
    rotation_range=10,
    width_shift_range=0.1,
    height_shift_range=0.1,
    shear_range=0.1,
    zoom_range=0.1,
    horizontal_flip=True,
    fill_mode='nearest'
)

mask_images = X[y == 'with_mask']
incorrect_mask_images = X[y == 'mask_weared_incorrect']

augmented_images = []
augmented_labels = []

for image in incorrect_mask_images:
    image = image.reshape((1, *image.shape))
    for batch in datagen.flow(image, batch_size=1):
        augmented_images.append(batch[0])
        augmented_labels.append('mask_weared_incorrect')
        if len(augmented_images) >= len(mask_images):
            break

augmented_images = np.array(augmented_images, dtype=np.uint8)
augmented_labels = np.array(augmented_labels)

X_balanced = np.concatenate([X, augmented_images], axis=0)
y_balanced = np.concatenate([y, augmented_labels], axis=0)

from sklearn.utils import shuffle
X_balanced, y_balanced = shuffle(X_balanced, y_balanced, random_state=42)

print("데이터 증강 이후 밸런스  확인:", dict(zip(*np.unique(y_balanced, return_counts=True))))

# Display some augmented images
plt.figure(figsize=(12, 6))
for i in range(6):
    plt.subplot(2, 3, i + 1)
    plt.imshow(cv2.cvtColor(augmented_images[i], cv2.COLOR_BGR2RGB))
    plt.title("mask_weared_incorrect (증강된 이미지)")
    plt.axis('off')
plt.tight_layout()
plt.show()
from sklearn.preprocessing import LabelEncoder

# 'with_mask'는 0, 'without_mask'는 1로 변환하도록 레이블을 설정
label_encoder = LabelEncoder()
label_encoder.fit(y_balanced)

# y 라벨을 변환
y_encoded = label_encoder.transform(y_balanced)  # 변환된 값은 0과 1로 나타남

# 변환된 값 확인
print(y_encoded[:15])
아래는 데이터셋을 시각화 하는 함수를 정의하고, 추출된 사진들을 랜덤하게 추출합니다.
# 본 코드는 https://www.kaggle.com/code/sahityasetu/face-mask-detection-ann-cnn-transfer-learning 참고
def visualize_images(X, y_encoded, label_encoder, num_images=10):
    plt.figure(figsize=(15, 10))
    indices = random.sample(range(len(X)), num_images)

    for i, idx in enumerate(indices):
        image = X[idx].reshape(128, 128, 3)

        # BGR로 표현된 사진을 RGB로 바꾸기
        image = image[..., ::-1]

        label_index = y_encoded[idx]

        label = label_encoder.inverse_transform([label_index])[0]

        plt.subplot(2, 5, i + 1)
        plt.imshow(image.astype('uint8'))
        plt.title(f'Label: {label}')
        plt.axis('off')

    plt.tight_layout()
    plt.show()

visualize_images(X, y_encoded, label_encoder, num_images=10)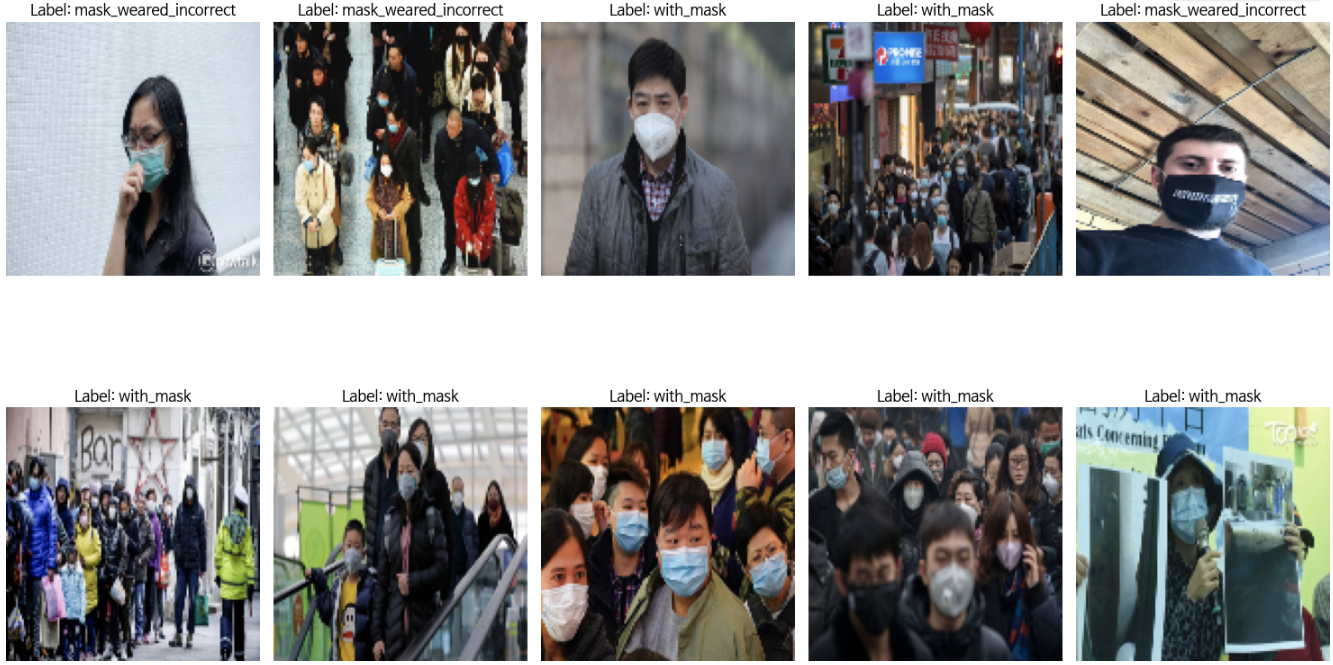
# 정규화 (0 ~ 1)
X_normalized = X_balanced / 255.0

# 테스트셋의 양이 적어 6:4 비율로 나누었습니다.
X_train, X_test, y_train, y_test = train_test_split(X_normalized, y_encoded, test_size=0.4, random_state=42)

print(f"Training data shape: {X_train.shape}, Training labels shape: {y_train.shape}")
print(f"Testing data shape: {X_test.shape}, Testing labels shape: {y_test.shape}")# 디코딩을 통해 테스트 셋의 실제 라벨 확인
test_labels = label_encoder.inverse_transform(y_test)
# 각 클래스별로 라벨 카운트 출력
from collections import Counter
label_counts = Counter(test_labels)
print("Testing data label counts:")
for label, count in label_counts.items():
print(f"{label}: {count}")
# 테스트 데이터셋의 라벨을 샘플로 확인
print("\nSample test labels:")
print(test_labels[:10]) # 앞 10개 라벨 출력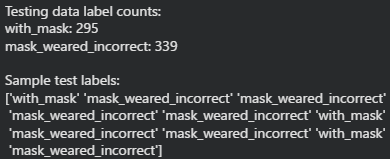
결론
여기까지 딥러닝 분석을 위한 전처리 과정입니다.
다음글부터는 모델을 설계하고 학습하거나 파인튜닝하는 과정에 대해서 다루겠습니다.
'프로젝트' 카테고리의 다른 글
| [인공지능 프로젝트] 마스크 착용 여부 탐지 프로젝트 - 2편 (0) | 2026.01.30 |
|---|---|
| [인공지능 프로젝트] 마스크 착용 여부 탐지 프로젝트 - 1편 (0) | 2026.01.22 |
| [인공지능 프로젝트] 저시력자를 위한 실내 근거리 물체 탐지 및 알림 시스템 - 7편 (GUI 및 메인 프로그램) (0) | 2026.01.09 |
| [인공지능 프로젝트] 저시력자를 위한 실내 근거리 물체 탐지 및 알림 시스템 - 6편 (통합 시스템 구축) (1) | 2026.01.02 |
| [인공지능 프로젝트] 저시력자를 위한 실내 근거리 물체 탐지 및 알림 시스템 - 5편 (깊이 추정 모델의 학습 결과) (0) | 2025.12.26 |
